This step-by-step tutorial will teach you how to test paper prototypes (wireframes) of mobile websites with an Iphone made of paper. It’s simple, quick, relatively realistic and adds a lot of fun to testing sessions.
Things, files and devices needed
 For your convenience please download:
- iPhone template (.doc)
- Template for making paper wireframes (.doc)
You can make these files yourself, but it would need some calibrating.
The only electronic device you will need is a printer. You will also need:
- paper, scotch tape, a knife, scissors, a pen.
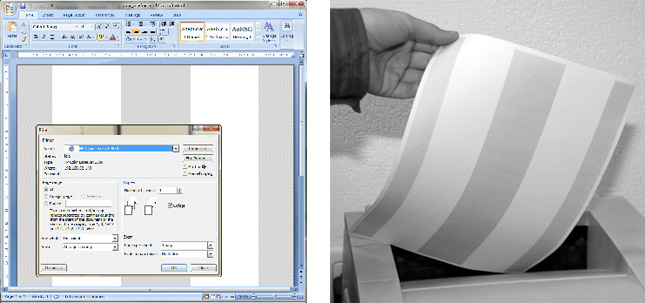
1. Make an iPhone
Open the document with the phone and print it out.
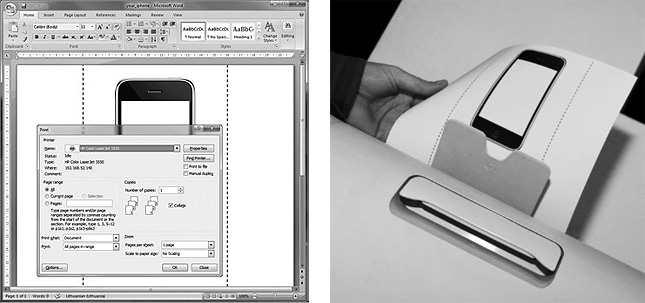
Cut out it’s "screen".
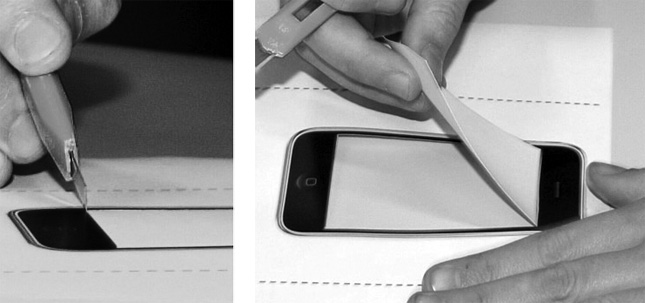
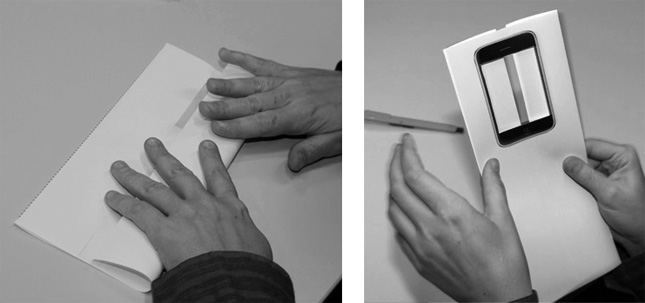
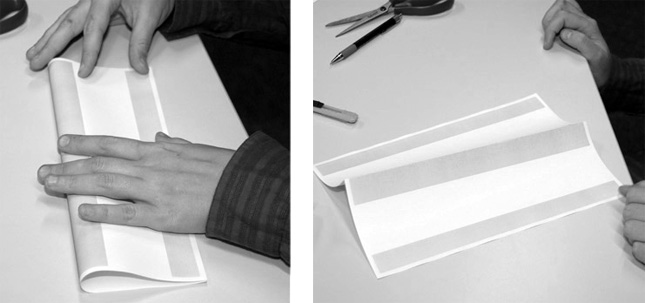
Fold it along two dotted lines.
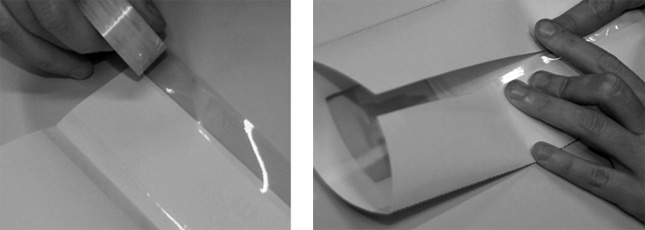
If you apply the tape on the inside of the bend, it will later be easier to slide the wireframes up and down (but the downside is that the Paper iPhone will not be completely flat).

Use the tape to join both edges of the paper (the tape is applied twice – from the inside and from the outside).

The result is the Paper iPhone (I made two, actually – it’s convenient to use two Paper iPhones for testing with two wireframes):

2. Draw your wireframes
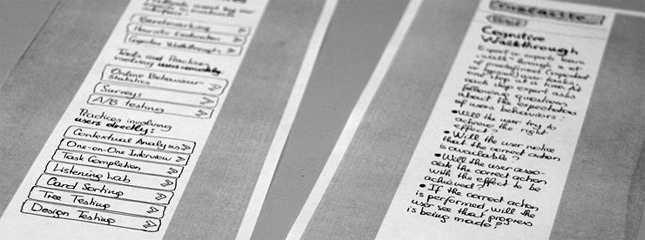
Open the document with the template for drawing wireframes and print it out.
Fold it in half and cut along the fold – and you have two paper sheets to draw your wireframes.
Draw your wireframes on the white background – grey background marks the areas not seen in our Paper iPhone.

3. Test your wireframes!
Tuck the wireframes into the iPhone (it’s more convenient to use two iPhones for two wireframes). That’s it – now you can scroll the prototype with your finger, almost like in a real phone.
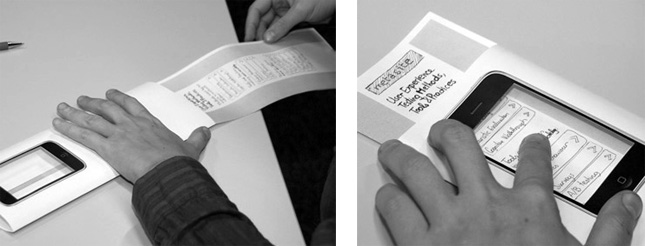
When the user "taps" on a menu item, just hand him/her the target page.

 Arnold Dapkus
 Aldas Kirvaitis
Comments are closed.